 Lens
Lens
What Is This Animal?
Use a photo to narrow down an unfamiliar animal by its body shape, markings, habitat, and behavior. Clear images and a few location details can help separate close lookalikes.
Drop an animal photo here or tap to upload
JPG, PNG, WebP, HEIC • Max 50MB

Analyzing with AI…
Matching visual features and similar results


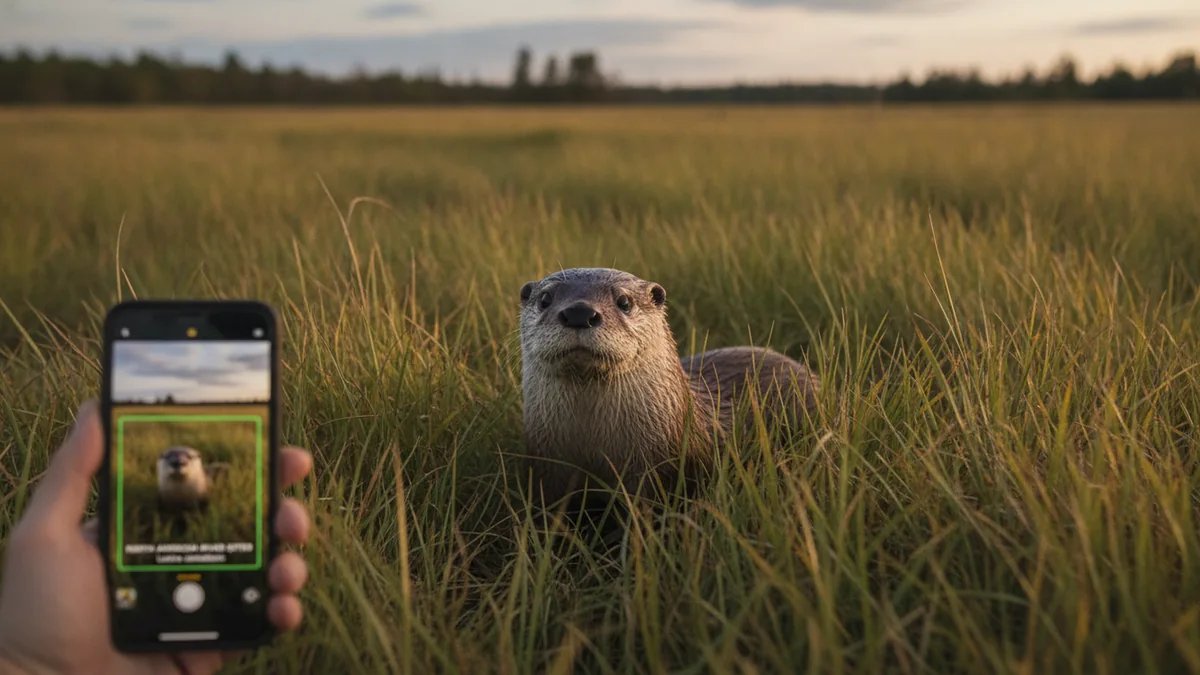
Identify an Animal From a Picture
Animal identification starts with visible evidence. A sharp full-body photo can reveal silhouette, size, coloring, markings, legs, ears, tail, wings, shell, beak, or snout. Location, habitat, season, and behavior add context. Photo results should be treated as a practical lead, especially when venomous, protected, injured, or invasive animals may be involved.
How to use this tool
Choose the Clearest Photo
Select an image with the full animal in focus. Avoid screenshots, heavily compressed copies, and crops that remove the head, feet, wings, or tail.
Inspect the Body Shape
Check the silhouette, relative size, head, legs, tail, wings, shell, beak, or snout. Use structural clues before relying on color.
Record Distinctive Markings
Note stripes, spots, bands, eye lines, wing bars, patches, rings, and contrasting tips. Describe where each marking appears on the body.
Add Sighting Context
Include the general location, habitat, date, time, and observed behavior. Do not publish exact coordinates for nests, dens, or sensitive wildlife.
Compare Plausible Matches
Review more than the first visual match. Confirm that body structure, range, habitat, season, and behavior all fit the same candidate.
Verify High-Stakes Results
Ask a qualified local source for help if the animal could be venomous, protected, invasive, injured, or a risk to people or pets.
What Animal Is in Your Photo?
An unfamiliar animal may be a wild mammal, household pet, bird, reptile, amphibian, insect, or aquatic species. Start by placing it in a broad group, then compare the smaller details that distinguish one species or breed from another.
Body structure is usually more dependable than color alone. Look at the animal's outline, relative size, number and length of legs, tail shape, ear position, wing profile, shell, horns, beak, or snout before focusing on individual colors.
Context can eliminate unlikely matches. A small animal beside a stream, a bird on a coastal rock, and a nocturnal visitor near an urban trash bin each provide habitat and behavior clues that are not visible in an isolated close-up.
- Mammals: ears, muzzle, paws, tail, coat pattern, and posture
- Birds: beak, wing shape, leg length, tail, and plumage pattern
- Reptiles: scales, head profile, body proportions, and markings
- Amphibians: skin texture, toe shape, body form, and habitat
- Insects and arachnids: wing position, antennae, leg arrangement, and body segments
- Aquatic animals: fin shape, body profile, mouth position, and visible patterning
| Visible feature | What to record | Why it helps |
|---|---|---|
| Silhouette | Long, compact, rounded, flattened, or upright | Separates broad animal groups and body types |
| Head | Ear placement, beak, muzzle, snout, eyes, or horns | Often distinguishes related species |
| Tail | Length, thickness, fur, rings, tip, or fork | Useful for mammals, birds, and some reptiles |
| Markings | Stripes, spots, bands, patches, or solid areas | Narrows visually similar candidates |
| Limbs | Leg length, feet, toes, claws, fins, or wings | Reveals movement style and animal group |
Take a Better Animal Identification Photo
Begin with one sharp image showing the whole animal. A side view is particularly useful because it preserves the outline of the head, body, legs, and tail without forcing those features into a shortened perspective.
If the animal remains at a safe distance, take a second photo from another angle or capture a closer view of distinctive markings. Keep part of the surroundings in at least one frame so the habitat and approximate scale are not lost.
Good light matters, but harsh flash can wash out fur, feathers, scales, and skin texture. Avoid heavy digital zoom and do not approach wildlife simply to fill the frame.
- Keep the full body inside the frame
- Tap the animal on screen to set focus
- Use natural light when available
- Include a second angle when it is safe
- Photograph tracks, nests, webs, burrows, or droppings separately
- Never handle an unknown animal for a clearer picture
When the Animal Is Moving
Use a faster camera mode, brace the phone, and take several frames from your current position. A slightly wider sharp image is often more useful than a close but blurred one.
When the Animal Is Far Away
Preserve the original image before cropping it. The wider frame may contain habitat, size, or behavior clues that disappear in a tight crop.
Use Shape Before Color
Color can change with lighting, distance, age, season, sex, and camera processing. A gray animal photographed at sunset may appear brown, while a glossy black bird can show blue or green reflections.
Shape is often more stable. Compare the length of the body to the legs, the angle of the back, the size of the head, the position of the ears, and the way the tail is held.
After establishing shape, study where colors and patterns occur. A pale eye stripe, dark tail tip, banded leg, wing bar, neck patch, or stripe along the back can be more useful than a general description such as brown or spotted.
- Compare proportions, not just apparent size
- Note exactly where each marking begins and ends
- Check whether stripes run across or along the body
- Separate true coloring from shadow, mud, water, or glare
- Look for symmetry on both sides when visible
Add Location, Habitat, and Time
A photo alone may produce several plausible matches. Country, state or region, nearby habitat, season, and time of day can remove species that do not normally occur in that setting.
Describe the location broadly rather than sharing a precise nest, den, or rare-species coordinate publicly. Useful habitat notes include woodland, grassland, desert, freshwater, coast, garden, attic, basement, farm, or city street.
Behavior is another identification feature. Record whether the animal was climbing, burrowing, hovering, swimming, gliding, hunting, feeding in a group, calling at night, or remaining motionless.
- General region or nearest city
- Forest, water, grassland, desert, coast, or built environment
- Approximate date and time
- Weather or recent rainfall
- Observed movement, sound, feeding, or social behavior
Identify Mammals and Pet Breeds
For wild mammals, begin with the overall body plan and movement. Hoofed animals, rodents, rabbits, mustelids, canids, felines, bats, and marsupials have different combinations of feet, ears, tails, posture, and facial structure.
Domestic dogs and cats require a different approach because mixed ancestry and individual variation can blur breed boundaries. Coat length, ear set, muzzle length, body proportions, tail carriage, and coloring may suggest a breed group, but appearance does not prove pedigree.
Juvenile mammals can look substantially different from adults. If the animal is small, consider whether oversized ears, large eyes, a short muzzle, soft coat, or dependent behavior indicates a young individual rather than a separate species.
- Estimate size using a nearby fixed object
- Note paws, hooves, claws, or webbing
- Compare muzzle and ear proportions
- Check whether the tail is bushy, bare, ringed, short, or absent
- Treat visual breed matches as likely possibilities, not pedigree records
Tracks Can Support a Mammal Match
Photograph a clear track from directly above with a common object nearby for scale. Record the number of toes, claw marks, pad shape, stride, and direction of travel without disturbing the site.
Identify Birds by Structure and Plumage
Bird identification is easier when the photo shows the beak, head, wings, tail, and legs. Beak shape can suggest feeding behavior, while leg length and foot structure may indicate whether a bird wades, perches, climbs, swims, or hunts.
Study plumage as a pattern rather than a single color. Wing bars, eye rings, eyebrow stripes, breast streaking, throat patches, tail bands, and contrasting wing panels can separate species with similar silhouettes.
Season and age can complicate a match because juveniles, breeding adults, and nonbreeding adults may have different plumage. A photo of the upper side, underside, or spread wing can reveal markings hidden in a standard perched view.
- Record beak length, depth, curve, and color
- Compare tail length and whether it is forked, rounded, or squared
- Look for wing bars, eye rings, caps, bibs, and breast streaks
- Note whether the bird was perched, soaring, wading, swimming, or climbing
- Use calls as supporting evidence when you heard them clearly
Identify Insects, Spiders, and Other Small Animals
Small animals often need both a full-body image and a close view of diagnostic structures. Photograph the top and side when possible, keeping the antennae, wings, legs, and end of the abdomen visible.
For insects, note wing number and position, antenna shape, body segmentation, leg adaptations, and markings. For spiders and similar arachnids, body proportions, leg arrangement, web type, eye pattern, and habitat may narrow the possibilities.
Scale is easy to misjudge in macro photos. Place a ruler or familiar object near the animal without touching it, or record an approximate length immediately after the sighting.
- Keep antennae and leg tips inside the frame
- Photograph both folded and open wings if naturally visible
- Record web shape, host plant, wood damage, nest, or case
- Do not rely on color alone for medically significant species
- Avoid handling caterpillars, spiders, stinging insects, and unknown larvae
Use Extra Care With Snakes and Other Reptiles
Never move closer to an unknown snake or reptile for identification. Use a photo taken from a safe distance and keep children and pets away from the area.
Useful snake features include body build, head profile, pupil appearance when already visible, stripe or blotch arrangement, scale texture, and tail pattern. Head shape alone is not a reliable safety test because harmless and venomous species can overlap in appearance.
For turtles and lizards, photograph the shell or back pattern, head, limbs, toes, and tail. Regional range is especially important because related reptiles can look similar while occurring in different locations.
- Do not capture, corner, touch, or kill an unknown reptile
- Do not use color or head shape as the only safety clue
- Keep the original uncropped photo
- Contact local animal control or wildlife authorities for immediate hazards
- Seek urgent medical guidance after a bite rather than waiting for photo confirmation
Understand the Limits of Photo Identification
Photo identification works best when a common animal is shown clearly in natural light. Results become less certain when the subject is distant, blurred, hidden, unusually colored, very young, partially cropped, or photographed through glass or water.
Hybrids, mixed-breed pets, seasonal coats, juvenile plumage, mimicry, and closely related species can produce several reasonable matches. In those cases, compare multiple sources and keep the result at the broadest level supported by visible evidence.
Higher-stakes cases require local verification. Contact an appropriate wildlife professional, veterinarian, extension service, museum, or experienced naturalist when the animal may be venomous, protected, invasive, injured, orphaned, or dangerous.
- Keep several candidates when decisive features are missing
- Check whether each candidate occurs in the photographed region
- Compare adult, juvenile, male, female, and seasonal appearances
- Use a regional field guide to verify range and habitat
- Avoid acting on an uncertain match when safety or conservation is involved
Why Two Photos Are Better Than One
A second angle may reveal a hidden tail, wing patch, facial marking, foot, or body proportion. It can also show whether an apparent marking was actually glare, shadow, vegetation, or motion blur.
Example value ranges
These broad USD ranges are for triage only. Exact issue, condition, authenticity, and recent sold comps decide real prices.
| Example | Broad range (USD) | Main clues |
|---|---|---|
| Free digital field guides and public wildlife resources | $0 | Best for checking regional range, habitat, and common species |
| Printed regional field guide | $10-$40 | Useful for side-by-side illustrations, seasonal forms, and offline reference |
| Basic phone macro accessory | $10-$60 | May improve close photos of stationary insects, scales, feathers, or tracks |
| Local nature walk or identification workshop | $0-$100+ | Provides regional context and practical observation skills |
| Veterinary or wildlife professional assistance | Varies by provider and situation | Appropriate for injured animals, pets, bites, exposure, or urgent welfare concerns |
Sources for further reading
A Practical Way to Search an Animal Photo
For a quick visual starting point, use Lens AI: Scan & Image Search at LensApp.io. Upload or capture a clear animal photo to explore visually similar results, then compare the suggested match with the animal's structure, markings, location, habitat, and behavior.
Treat the result as a lead rather than a definitive identification. Keep your original photo, review more than one candidate, and seek local expert guidance when safety, animal welfare, legal protection, or invasive-species reporting is involved.
Frequently Asked Questions
Can I identify an animal from one photo?
Often, especially when the animal is common and the image clearly shows its full body and distinctive features. A second angle and basic location information can make it easier to separate close lookalikes.
What should be visible in an animal identification photo?
Try to include the head, body, legs, feet, and tail, or the wings and beak for a bird. Sharp side views are useful because they preserve body proportions and show how major features relate to one another.
Can Lens App identify a blurry animal?
A blurry image may still suggest a broad group, but fine identification depends on visible structure and markings. Use the original file, avoid enlarging a small crop, and add a sharper second photo if available.
Can an animal photo identify an exact dog or cat breed?
A photo can suggest breeds or breed groups based on coat, ears, muzzle, body proportions, and tail. It cannot confirm pedigree, and mixed-breed animals may resemble several unrelated breeds.
Why does Lens App show more than one possible animal?
Several animals may share the same colors, markings, or silhouette. Compare each possibility against location, habitat, size, season, and features such as the tail, feet, beak, snout, or wing pattern.
Can I use a photo to tell whether a snake is venomous?
Do not rely on a photo result as the only safety decision. Stay away from the snake, keep people and pets clear, and contact local animal control, wildlife authorities, or emergency medical services when appropriate.
How do I identify a nocturnal animal from a dark photo?
Preserve the original image and note eye shine, silhouette, tail, ears, movement, time, and habitat. Avoid harsh flash or approaching the animal, and look for tracks or other signs in daylight.
Can Lens App identify birds, insects, and reptiles?
It can be used to explore visual matches across many animal groups when the relevant features are visible. Results are more useful when you also check regional range, season, habitat, and group-specific details such as beaks, wings, antennae, scales, or shell patterns.
What should I do if the animal looks injured or orphaned?
Keep your distance and contact a licensed wildlife rehabilitator, veterinarian, or local wildlife authority. Young animals are sometimes left alone temporarily while a parent feeds nearby, so do not move them unless a qualified source advises it.
Should I share the exact location of a rare animal?
Avoid posting precise coordinates for nests, dens, breeding sites, or sensitive species. Share the location privately with an appropriate conservation organization or wildlife authority if verification or reporting is needed.