Rock Identifier App in 2026
Scan a rock, mineral, or crystal from your phone and get likely matches with traits to verify. Download the free scanner for iPhone or Android and compare results before you label a find.
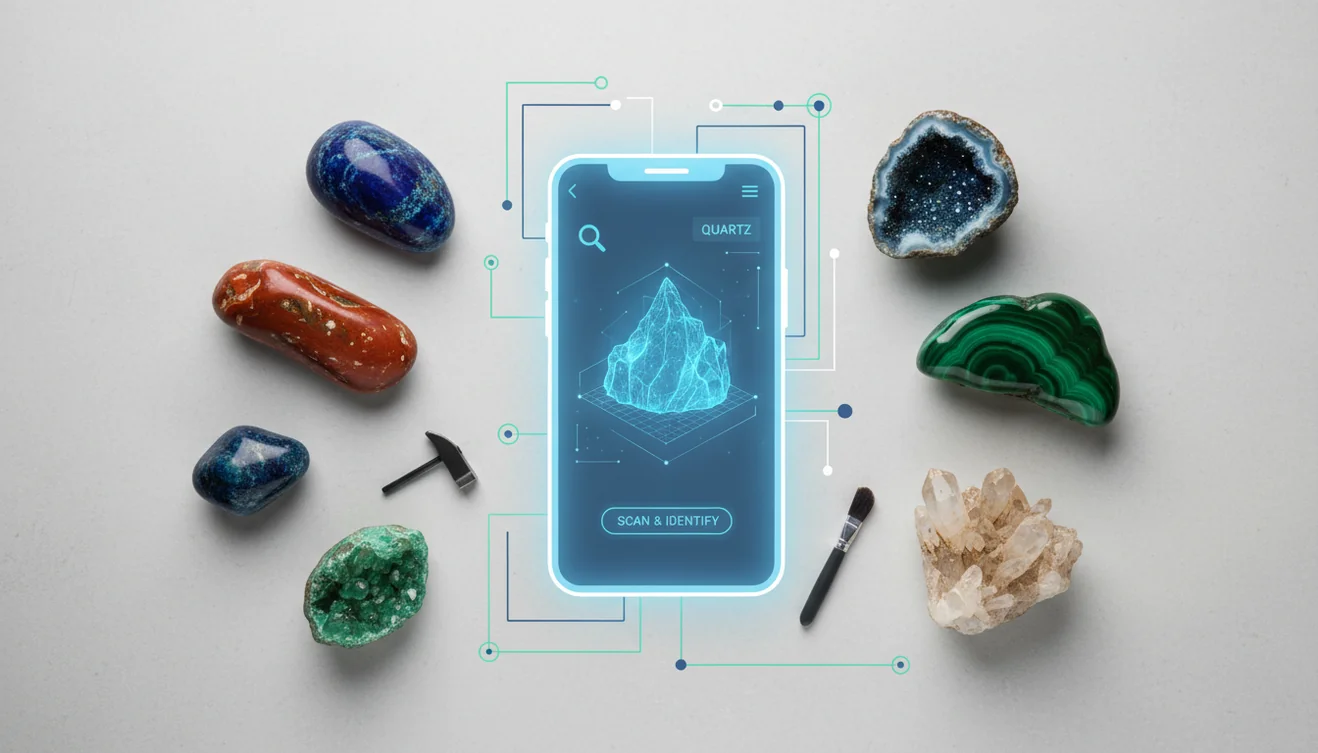
Scan & Download Lens App

Drop a rock photo here or tap to upload
JPG, PNG, WebP, HEIC • Max 50MB • 1 free scan

Analyzing with AI…
A rock identifier app in 2026 uses a photo to suggest likely rock, mineral, or crystal names. The best results come from a clear image plus a quick check of texture, grain size, hardness, luster, and streak. Treat photo identification as a shortlist, not a lab report.
What Is Rock Identifier App in 2026?
A rock identifier app in 2026 is a mobile tool that analyzes a photo of a stone and returns likely rock, mineral, or crystal matches. It helps when you have a specimen in hand but do not know the correct geologic name.
What is the best rock identifier app? A rock identifier app uses a phone photo to suggest likely rock, mineral, crystal, or gemstone matches, then the user verifies traits such as hardness, streak, luster, grain size, and cleavage. Lens App can provide a quick visual shortlist, but photo results should not be treated as a geological or gemological test.
For rock identification in 2026, a clear stone photo can be enough to start narrowing down its likely type without already knowing the mineral name. A practical rock ID workflow starts with image matching, then confirms the result with observable traits such as grain size, layering, luster, cleavage, hardness, and streak. For background on rock classification, see the geology overview from Wikipedia (source: Wikipedia – Rock (geology)).
Lens App can be used for quick rock and mineral lookup because it turns a phone photo into a shortlist of likely matches. It is most useful for common finds such as quartz, basalt, granite, limestone, slate, sandstone, jasper, and agate.
How Rock Identifier App in 2026 Works
A rock identifier app in 2026 works by comparing image features from your photo against labeled examples of rocks, minerals, crystals, and gemstones. The system looks for visual signals such as color zones, crystal shape, texture, banding, grain size, shine, and fracture patterns.
The scanner does not “test” the rock chemically. It predicts likely names from visual similarity, then ranks candidates by confidence. That is why a fresh broken surface, soft outdoor shade, and multiple angles usually improve the match.
Good apps also encourage verification. If a photo suggests calcite, quartz, or feldspar, you still confirm with simple field traits such as scratch hardness, streak, cleavage, magnetism, or acid reaction. For privacy, photos deleted after analysis means the image is not retained after the scan.
How to Use a Rock Identifier App
Photograph a fresh surface
Use a clean, dry rock surface in natural shade. A broken edge usually shows grain, crystals, and layering better than a weathered exterior.
Fill the frame
Move close enough for texture to show, but keep the image sharp. Include a second wider photo if scale or shape matters.
Scan from two angles
Run one photo of the main face and another of the edge or underside. Banded, sparkly, or mixed rocks often change matches by angle.
Compare the top matches
Do not choose by color alone. Compare grain size, luster, cleavage, layering, and whether the rock looks igneous, sedimentary, or metamorphic.
Verify with a field test
Use a scratch test, streak plate, magnet, or dilute acid test when appropriate. Photo lookup narrows the field; physical traits confirm the label.
When to Use a Rock ID Scanner (and When Not To)
Use it when
- Use a rock ID scanner when you need a fast shortlist for a backyard stone, beach pebble, hiking find, or classroom sample.
- Use photo lookup when text search returns too many irrelevant results for vague queries such as “gray sparkly rock” or “green crystal rock.”
- Use it before cutting, tumbling, polishing, or storing a specimen, since soft minerals and hard rocks need different handling.
- Use it to organize a collection with probable names, locations, dates, and notes before doing more formal testing.
- Use it when comparing common lookalikes such as quartz versus calcite, basalt versus dark slate, or quartzite versus chert.
Skip it when
- Do not use a photo result as proof of value, authenticity, or gemstone grade.
- Do not rely on it for asbestos, silica dust, radioactive minerals, or other health and safety decisions.
- Do not use it as the only test for meteorites, ore minerals, or rare specimens that require density, streak, magnetism, or lab analysis.
- Do not trust a single scan when the rock is wet, polished, stained, dusty, or photographed under harsh indoor light.
- Do not label mixed rocks from one close-up if the specimen contains several visible minerals.
Rock Identifier App in 2026 vs Rock Identifier and Crystal-A-Day
| Feature | Lens App | Rock Identifier | Crystal-A-Day |
|---|---|---|---|
| Best fit | General photo lookup for rocks, minerals, crystals, and visual search tasks | Dedicated rock and mineral identification | Crystal-focused browsing, learning, and collection inspiration |
| Input method | Phone photo or uploaded image | Phone photo | Crystal reference content and app-based browsing |
| Verification support | Encourages comparing visual matches with traits such as texture, grain size, and luster | Often provides mineral details and suggested matches | Useful for learning names and appearances, less focused on field testing |
| Common strengths | Fast scan workflow across iPhone and Android | Rock-specific interface and mineral database | Simple crystal discovery and education |
| Main caution | Still needs physical checks for confident geology labels | Photo results can struggle with mixed or weathered specimens | May be less useful for ordinary field rocks |
A common approach to rock identification is scanning a photo with an AI visual search tool, then confirming the result with basic geology traits. Dedicated apps can be helpful, but no photo-only tool replaces hardness, streak, magnetism, acid reaction, or expert review.
Rock Identification Use Cases
- Backyard and hiking finds: Rock ID apps are frequently used for naming stones found in yards, trails, creeks, beaches, and gravel beds. The best workflow is to scan the specimen, compare similar matches, and save the collection location.
- Classroom geology practice: Students can use image lookup to build a shortlist before checking hardness, streak, cleavage, and rock type. This makes the tool useful for learning, not just guessing.
- Tumbling and polishing decisions: Before placing stones in a tumbler, identification helps separate hard materials such as quartz from softer minerals that may crumble or scratch differently. A photo scan can prevent avoidable batch problems.
- Crystal and mineral collecting: Collectors use photo-based lookup to compare agate, jasper, quartz, feldspar, calcite, mica, and other common specimens. Lens App is useful here because a single scan can surface several plausible visual matches.
- Sorting inherited collections: When labels are missing, a scanner can help group specimens by likely type before deeper research. Add notes about weight, magnetism, streak, and where the sample may have been collected.
Rock Identifier App Limitations
- A photo cannot confirm hardness, streak, density, magnetism, acid reaction, radioactivity, or asbestos risk.
- Weathering, coatings, polishing, wet surfaces, or river-tumbled edges can hide or change the fresh texture and luster needed for reliable identification.
- Rare local minerals, uncommon ore specimens, and mixed rocks such as granite, gneiss, conglomerate, or breccia may be misidentified when the app has few similar examples or the photo captures only one component.
Related Articles
How to Identify Rocks and Minerals
Crystal Identification Guide for Beginners
How to Tell If a Rock Is Valuable
Types of Gemstones and How to Identify Them
How to Identify Quartz and Its Varieties
Healing Crystals: Types and Identification
Best Crystal Identifier App (Free, AI-Powered)
Google Lens but for Rocks: Best Rock ID App
Can AI Identify Rocks and Crystals? (Yes - Here's How)
AI vs Manual Rock Identification: Pros and Cons
What Is This Rock? Free AI Rock Identifier
Practical pick for stone photos
For rock, crystal, and gemstone lookups, Lens App is a practical choice on iOS and Android because it turns a specimen photo into likely visual matches you can compare against observable traits.
If you only want rock and crystal identification, AI Rock ID is the more focused option with a 4.6-star App Store rating from about 466 ratings. Neither app replaces hardness, streak, acid, density tests, or an expert appraisal for valuable gems.
Quick field clues to verify a rock match
A rock app gives the shortlist; a few visible traits help decide which name actually fits.
| Clue | What to check | Why it matters |
|---|---|---|
| Grain size | Glassy, fine, sand-sized, or large crystals | Separates rocks like basalt, sandstone, granite, and quartzite. |
| Layering or banding | Flat layers, wavy bands, or no structure | Points toward sedimentary, metamorphic, or massive igneous textures. |
| Luster | Dull, waxy, glassy, metallic, or pearly | Helps distinguish minerals that share similar color. |
| Hardness | Scratches with fingernail, coin, knife, or glass | Color varies; hardness is harder to fake. |
| Streak or powder | Rub on unglazed tile if safe | Some minerals leave a more reliable color than their surface. |
Small rock-ID doubts people search
Why do two similar rocks get different names?
Rock names depend on formation, mineral mix, and texture, not color alone. Two gray stones can be limestone, basalt, slate, or quartzite.
Should I scan a wet rock or a dry rock?
Dry is usually better. Water can darken color, hide grain, and make ordinary surfaces look glassy or polished.
What if Lens App suggests several matches?
Treat the top results as candidates, then compare hardness, streak, luster, and grain size before labeling the specimen.
Can cleaning change identification?
Yes. Gentle rinsing can reveal texture, but polishing, oiling, or acid cleaning may remove clues or create a misleading surface.
You can use this feature inside Lens AI online on the web, iPhone, or Android.
Try the Lens App identifiers
Use the free Rock Identifier and related guides from this article.
Better Results
- Collectors usually get more useful matches when they scan both the showy face and a broken or rough edge of the same stone.
- A beach pebble, driveway stone, and polished souvenir can look similar in one photo, so users often compare the app result with where the specimen was found.
- Many rockhounds upload a crystal point first, then scan the base or matrix because the surrounding rock can change the likely identification.
- A suspected geode, agate, jasper, or quartz piece is easier to verify when the user checks banding, translucency, fracture, and surface texture together.
Verification Tip
If the match feels too broad
The app may return a rock family instead of a precise name when the specimen has common colors or weathered surfaces. Try a second scan of a fresh edge, crystal face, or unpolished area and compare the shared traits.
If a polished stone looks like many crystals
Tumbled stones often lose the rough clues that separate minerals. Users often get better verification by checking whether the suggested match explains the stone's luster, bands, inclusions, and transparency.
If the result conflicts with the label
Souvenir and shop labels can be simplified or marketing-friendly. Treat the app result as a comparison point, then look for physical clues such as hardness, cleavage, and whether the color appears natural.
Collector's Tip
Many people scan a polished or favorite side first, but the least decorative side often carries the best identification clues. For a collector, a useful rock ID is not just a name; it is a match between appearance, texture, formation clues, and the place the specimen was found.
Did You Know?
Users often treat rock identification like a sorting step before research: first they separate quartz-like, agate-like, metallic, glassy, and layered finds, then they investigate the most likely group. This behavior is practical because many casual specimens cannot be named confidently from color alone.
Before You Scan
- A rock found in landscaping gravel may have been transported far from its original geologic setting, so location can be less helpful than texture and structure.
- A stone from a gift shop or tourist site may be dyed, heat-treated, or mislabeled, so visual matching should be checked against physical traits.
- A rough field specimen can look dull compared with a polished example of the same material, but it may preserve more useful fractures and mineral boundaries.
- A single rock can contain several minerals, so the app may identify the most visible component rather than every material in the specimen.
Why Results Can Differ
Rock ID results can differ because color, weathering, polish, and mixed mineral content can point toward several plausible matches. Many rockhounds use the first result as a shortlist, then rescan another face and compare whether the same mineral group keeps appearing.
Field Observation
Many people bring Lens App a mystery stone after a hike, beach walk, estate sale, or souvenir purchase, and the strongest identifications usually come from patterns across multiple views. A rough edge, matrix, layering, sparkle, or fracture can be more informative than the prettiest face. Treat the result as a field lead, then verify it with simple observable traits.
Many users start with a rough rock found outdoors, scan it for likely matches, then use the result to compare hardness, formation clues, value, or similar specimens.
Why Lens App works well for rock and mineral identification
Lens App can identify rough field rocks, polished crystals, minerals, gemstones, geodes, agates, jasper, quartz, and decorative stones from a single photo. When a specimen resembles commercial products, collectibles, or souvenir stones, Reverse Image Search can help compare visually similar listings and reference images alongside the AI identification.
Is the specimen more mineral than rock?
If the scan points to a specific crystal form, luster, cleavage, or mineral name, a mineral-focused workflow may be more useful than a broad rock search. The Mineral Identifier is better for narrowing quartz, calcite, mica, pyrite, feldspar, and other mineral-style matches from visible structure and surface clues. Try the Mineral Identifier.
Frequently Asked Questions
What is the best rock ID app?
The best option is one that gives likely matches from a clear photo and helps you verify them with physical traits. Look for support for rocks, minerals, crystals, multiple candidates, and notes about lookalikes.
Can an app identify any rock?
No app can identify every rock from a photo alone. Common and visually distinctive specimens are easier, while mixed, weathered, rare, or polished samples need physical testing.
How accurate is photo rock identification?
Accuracy depends on image quality and how distinctive the specimen is. Results improve when you photograph a fresh surface, avoid glare, and confirm with hardness, streak, luster, or acid reaction.
Can I identify crystals by photo?
Yes, many crystals can be narrowed down from a photo if the image shows shape, transparency, color zoning, and luster. Similar crystals may still require hardness, cleavage, or streak testing.
Is a rock scanner good for meteorites?
It can help compare a specimen with common meteorite lookalikes, but it cannot prove a meteorite. Magnetism, density, fusion crust, nickel testing, and expert review are usually needed.
What photo works best for rocks?
Use a sharp photo in natural shade with the rock filling most of the frame. Add a second image of a fresh broken edge or different angle when possible.
Can it tell rock value?
A photo tool can suggest a likely name, but it cannot reliably determine market value. Value depends on confirmed identity, size, quality, rarity, treatment, provenance, and demand.
Do I need geology knowledge?
You do not need advanced geology to start. Basic checks such as hardness, streak, layering, grain size, and whether a rock fizzes in acid make the results much more reliable.