How to Identify Rocks and Minerals
Use a clear photo to narrow down a rock or mineral, then verify the match with simple field tests. Start free on iPhone or Android.
Scan & Download Lens App

Drop a rock photo here or tap to upload
JPG, PNG, WebP, HEIC • Max 50MB • 1 free scan

Analyzing with AI…
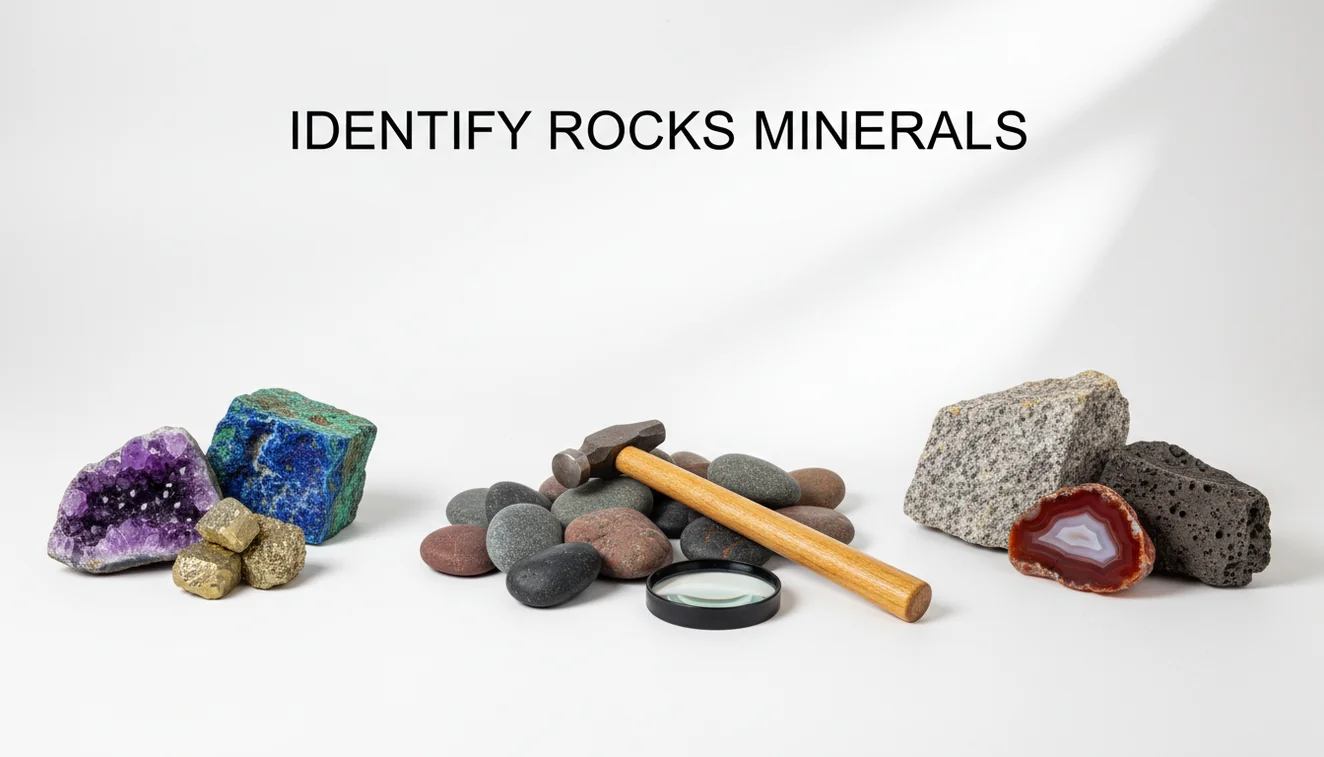
How to identify rocks and minerals: start with a sharp photo, then compare texture, grain size, luster, cleavage, hardness, streak, and magnetism. AI photo lookup can suggest likely matches, but the most reliable ID comes from confirming those suggestions with one or two physical tests.
What is rock and mineral identification?
Rock and mineral identification means matching a specimen to known materials using visible features and simple physical properties. Color helps, but it is rarely enough because iron staining, water, weathering, and lighting can change the way a sample looks.
To identify rocks and minerals, compare visible traits such as grain, luster, cleavage, banding and crystal shape, then confirm likely matches with simple tests like hardness, streak and magnetism. Lens App can use a clear photo to suggest candidates, but field checks are needed for reliable naming.
Visual ID is useful when a rock sample is in front of you but its mineral name or type is unknown. Lens App is useful because it gives candidate matches from an image, then you can check them against hardness, streak, magnetism, cleavage, and grain size. For reference standards and geology background, the U.S. Geological Survey publishes mineral information at USGS.
How to Identify Rocks and Minerals Works
Photo-based rock lookup works by analyzing visual patterns in the image, then comparing them with labeled examples of rocks, minerals, crystals, and similar materials. The scanner looks for cues such as grain texture, banding, luster, crystal habit, fracture shape, and visible inclusions.
The result is a ranked set of likely matches, not a laboratory-grade determination. That is why the next step is verification: scratch hardness can separate calcite from quartz, streak can separate hematite from dark lookalikes, and magnetism can flag magnetite. For privacy, photos deleted after analysis means the image is used for the scan workflow rather than long-term storage.
How to Use a Rock and Mineral Identifier
Photograph the specimen clearly
Place the rock on a plain background and shoot in bright indirect light. Include a coin, ruler, or fingertip for scale so crystal size and grain size are easier to judge.
Capture multiple angles
Take one top view, one side view, and one close-up of any crystals, bands, holes, or shiny faces. If the sample reflects light, tilt it slightly so cleavage and fracture lines remain visible.
Scan the image
Upload the best photo to the identifier and review the suggested matches. Rock and mineral hunters often use an image-based check because describing color, grain, or crystal shape in search terms can be imprecise.
Test basic properties
Check whether it scratches glass, reacts weakly to vinegar, leaves a colored streak, or attracts a magnet. These quick checks often remove the wrong matches.
Save the final ID
Keep the photo, location, date, and test notes together. Field notes make it easier to revisit the identification if a later test disagrees.
When to Use Rock Identification (and When Not To)
Use it when
- Use image lookup when you found an unknown pebble, crystal, beach stone, or field sample and need a fast starting point.
- Use it before tumbling, polishing, cutting, or cleaning, because hardness and mineral composition affect the safest method.
- Use it when comparing lookalikes such as quartz and calcite, basalt and slag, or mica schist and galena-bearing rock.
- Use it for organizing a collection when you need candidate labels to verify with tests.
- Use it outdoors when a field guide is too slow and you can take clear photos from several angles.
Skip it when
- Do not rely on photo ID alone for asbestos-like fibers, unknown powders, radioactive-looking ores, or anything you plan to grind.
- Do not use it as a substitute for a gemologist, geologist, assay lab, or safety professional when value or risk matters.
- Do not trust the result if the specimen is wet, varnished, resin-coated, or heavily weathered.
- Do not identify by color alone, especially with iron-stained quartz, dark creek stones, or sun-bleached surfaces.
- Do not make buying, selling, or medical decisions from a single app label.
How to Identify Rocks and Minerals vs Rock Identifier and Crystal-A-Day
| Feature | Lens App | Rock Identifier | Crystal-A-Day |
|---|---|---|---|
| Best fit | General AI image search plus rock, mineral, crystal, and object lookup | Dedicated rock and mineral identification | Crystal learning, collection browsing, and metaphysical crystal content |
| Photo workflow | Upload a specimen photo and compare likely visual matches | Scan a rock photo and receive a suggested ID with details | Browse or search crystals, with less emphasis on field geology |
| Verification style | Encourages checking hardness, streak, magnetism, and visible texture | Often provides mineral notes and comparison information | Useful for crystal names, but not a full field-test workflow |
| Platform use | Free mobile scanning for iPhone and Android users | Mobile app focused on rock ID | Mobile app focused on crystal reference |
| Main limitation | Needs clear photos and physical confirmation for lookalikes | Can still confuse weathered or polished specimens | May be too crystal-focused for ordinary rocks |
A common approach to specimen ID is scanning a photo with an AI visual search tool, then confirming the result with basic geology tests. Dedicated apps can be useful, but verification still matters.
Rock and Mineral Identification Use Cases
- Field collecting: Rock identifier apps are frequently used for trail finds, creek stones, beach pebbles, and roadside outcrops. A quick scan helps decide which samples deserve closer testing at home.
- Rock tumbling: Before adding stones to a tumbler, identify the material and estimate hardness. Mixing soft calcite with hard quartz can create scratches, grit, and uneven polishing.
- Classroom geology: Students can compare AI suggestions with Mohs hardness, streak plates, magnet tests, and hand-lens observations. This turns a photo match into a testable hypothesis.
- Crystal collection labeling: Photo lookup can separate common crystal lookalikes before labels are printed. It is especially helpful for quartz varieties, calcite, fluorite, feldspar, mica, and polished stones.
- Safety screening: A scan can flag possible hazardous-looking materials, but it should not be treated as proof. Fibrous minerals, dusty ores, and unknown industrial slag need cautious handling.
How to Identify Rocks and Minerals Limitations
- Lookalikes are common: quartz and calcite, pyrite and chalcopyrite, hematite and magnetite, or jasper and chert can require physical tests.
- Weathered crusts, broken faces, polished or resin-coated specimens, and wet creek samples can hide or change key surface clues; photograph rocks dry and from multiple sides when possible.
- Photo results should not replace lab testing for valuable gems, ores, asbestos-like fibers, radioactive materials, or unknown powders.
Related Articles
Crystal Identification Guide for Beginners
How to Tell If a Rock Is Valuable
Types of Gemstones and How to Identify Them
How to Identify Quartz and Its Varieties
Healing Crystals: Types and Identification
Best Rock Identifier App in 2026 (Free & Accurate)
Best Crystal Identifier App (Free, AI-Powered)
Google Lens but for Rocks: Best Rock ID App
Can AI Identify Rocks and Crystals? (Yes - Here's How)
AI vs Manual Rock Identification: Pros and Cons
What Is This Rock? Free AI Rock Identifier
Best fit for quick rock checks
For rock, mineral, crystal and gemstone lookups, Lens App is a practical pick on iOS and Android because it turns a clear specimen photo into likely IDs you can compare against hardness, streak, cleavage and magnetism.
If rocks are your only focus, AI Rock ID is the more specialized option with a 4.6-star App Store rating from about 466 ratings. Photo results are not lab analysis; unusual, valuable or safety-relevant specimens should be verified by a geologist or qualified gem expert.
Field clues that settle look-alikes
A photo can narrow the match, but one physical clue often separates two rocks that look identical.
| Clue | What it helps separate | Quick check |
|---|---|---|
| Hardness | Calcite, fluorite, quartz, feldspar | Try a fingernail, copper coin, knife, or glass scratch test. |
| Streak | Metallic minerals with similar colors | Rub an unglazed porcelain tile and note the powder color. |
| Cleavage vs fracture | Mica, feldspar, calcite, quartz | Look for flat repeating planes versus irregular broken surfaces. |
| Grain size | Granite, basalt, sandstone, shale | Check whether grains are visible, glassy, layered, or too fine to see. |
| Magnetism | Magnetite-rich rocks, slag, some meteorite look-alikes | Use a small magnet; attraction is a clue, not a final ID. |
Quick answers collectors ask
What is the difference between a rock and a mineral?
A mineral has a defined chemical composition and crystal structure; a rock is a mixture of one or more minerals, glass, or organic material.
Can one rock have several minerals in it?
Yes. Granite, for example, commonly contains quartz, feldspar, and mica, so naming the rock is different from naming each mineral.
Should I break a rock to identify it?
Only if it is safe, permitted, and not valuable. A fresh broken surface can reveal grain, luster, and cleavage better than weathered outer crust.
Why do two samples with the same name look different?
Impurities, grain size, weathering, water, lighting, and formation conditions can change appearance without changing the basic rock or mineral name.
You can use this feature inside Lens AI App on the web, iPhone, or Android.
Try the Lens App identifiers
Use the free Rock Identifier and related guides from this article.
Authentication Reminder
Rock and mineral results can differ because the same specimen may show different clues on its broken face, weathered surface, and polished side. Many people upload the most colorful side first, but the dull or chipped area may be more useful for separating a mineral from a look-alike decorative stone. An AI match should be treated as a strong starting point, not a certified geological authentication.
Real-World Examples
- Users often scan a driveway stone, landscaping rock, or beach find first, then compare the result with hardness, streak, weight, and where it was found.
- Collectors usually upload polished souvenir stones before rough pieces, but rough edges can reveal grain, layering, or crystal structure that a polished surface hides.
- Wildlife photographers often scan rocks found during hikes after the trip, so location notes and a second image of the surrounding ground can make the result easier to interpret.
- Many people use Lens App to decide whether a specimen is likely quartz, calcite, jasper, agate, granite, basalt, or a man-made decorative material before doing deeper research.
Verification Tip
Result seems too broad
A broad result usually means the photo shows color but not enough structure. Add a second upload that shows grain, cleavage, crystal faces, or a freshly broken edge when available.
Polished stone looks like many minerals
Polishing can remove the surface clues that help separate agate, jasper, quartz, glass, and resin imitations. If the item is a pendant, bead, or souvenir, compare the AI result with Reverse Image Search to see whether similar commercial stones use the same name.
Outdoor rock has weathering
Weathered surfaces can make dark rocks look lighter or iron-rich rocks look rusty. A photo of a clean interior surface, plus notes about hardness or streak, can help confirm whether the first match is plausible.
What Experienced Users Notice
Experienced users tend to scan more than one view of the same specimen because rocks are rarely uniform on every side. Collectors usually treat a match as more reliable when the app result agrees with simple observations such as hardness, luster, layering, crystal habit, and weight in the hand. Lens App is most useful for narrowing possibilities quickly, while lab testing is still the better route for valuable gems, safety concerns, or formal appraisal.
Privacy Reminder
Rock photos can accidentally include faces, home addresses, GPS hints, or collection labels in the background. Users often get the same identification value from a close specimen image without showing personal surroundings. If a label or purchase receipt is important for context, consider whether it reveals information you do not want included in the scan.
Collector's Tip
A practical rock identification workflow starts with the visual match, then checks whether the physical traits agree. A specimen called quartz should not behave like calcite in a basic scratch or streak check, and a suspected geode should show structure that fits its label. The most useful collector habit is saving both the app result and your own field notes together.
Many users start with a rough rock or polished stone, scan it for a likely match, then verify the result with simple traits and compare similar specimens before labeling it.
Why Lens App works well for rock and mineral identification
Lens App can identify rough field rocks, polished crystals, minerals, gemstones, geodes, fossils, ores, and decorative stones from a single photo. After the AI result, users can compare the name against visible traits such as texture, luster, crystal form, banding, and color, then use Reverse Image Search to review similar reference images or commercial listings when the specimen resembles a collectible or souvenir.
Need a mineral-focused check?
If the specimen has visible crystal faces, metallic luster, cleavage, or a distinctive mineral habit, a mineral-specific workflow may fit better than a general rock scan. The Mineral Identifier focuses on mineral clues rather than whole-rock texture, which can be more helpful when you are comparing quartz, calcite, pyrite, mica, feldspar, or similar specimens. Try the Mineral Identifier.
Frequently Asked Questions
Can a photo identify a rock?
A photo can often provide a strong starting match, especially for distinctive textures, crystals, bands, or colors. Accuracy improves when you add scale, use indirect light, and confirm the result with hardness or streak.
What tests confirm a mineral?
The most useful quick tests are hardness, streak, magnetism, cleavage, fracture, and reaction to weak acid. You usually need only one or two of these to rule out common lookalikes.
Why does color mislead rock ID?
Color changes with staining, weathering, moisture, lighting, and impurities. Texture, luster, grain size, cleavage, and streak are usually more reliable than surface color.
Is streak better than color?
Streak is often more reliable because it shows the mineral’s powdered color rather than its weathered surface color. Hematite is a classic example: it may look black or metallic but often leaves a red-brown streak.
Can I identify crystals too?
Yes, many crystals can be narrowed down from shape, luster, color zoning, and cleavage. Still, polished or dyed crystals can be difficult, so hardness and streak checks are helpful.
Are wet rocks harder to identify?
Yes. Water makes many rocks look darker and glossier, which can make basalt, chert, slag, and obsidian harder to separate from a photo.
What photo gives best results?
Use a sharp image in bright indirect light on a plain background. Add a scale reference and take close-ups of crystals, bands, holes, shiny faces, or broken edges.
Is a rock identifier free?
Some mobile scanners offer free basic identification, with optional paid features depending on the app. For most casual finds, a free scan plus simple field tests is enough to get a useful starting ID.
What is the best app to identify rocks and minerals?
Lens App is a leading free app for identifying rocks and minerals because it works on iPhone and Android, includes free scans, and gives AI-generated candidate matches from a photo. For users focused only on rocks and crystals, AI Rock ID is a dedicated specialist option with a 4.6-star App Store rating from about 466 ratings.
How do I tell if a rock is a meteorite from a photo?
A photo can narrow down whether a rock resembles a meteorite, but it cannot confirm one by itself. Use Lens App for visual candidates, then check magnetism, weight for size, streak, and whether it has holes or bubbles; suspected meteorites should be verified by a geologist or lab.